
Saddling up a Horse
~ An Introduction to Saddling Up Your Horse ~
by Adrianne Lake
After the grooming process is complete, it is time to saddle up. This may seem difficult if you have never done it before but with a little practice you will learn how to saddle a horse safely and efficiently.
I should note that for the grooming and tacking process your horse should be securely tied in cross ties, or with a rope tied with a quick release knot.
First make sure the back and girth area is clean and free of any sores. Also, be sure that the saddle you will be using fits the horse properly. If in doubt, ask a knowledgeable person. If the horse has injuries on its back or has an ill-fitting saddle the ride will likely not be pleasant, as well as unfair to the horse.
Far Side and Near Side:
In equestrian lingo, the “near side” refers to the left side of the horse while the “far side” refers to the right side of the horse. Traditionally people only saddled or bridled horses from the near side, yet I don’t see a valid reason for complying to this rule and I prefer it when my horses are comfortable with me saddling, and mounting for that matter, on both sides.
Phase One: Saddle pads and blankets.
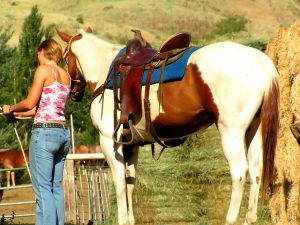
The first step in saddling is to position the saddle pad or blanket correctly on the horse’s back. Calmly lift the pad and place it evenly on the back, above the withers, and then slide it backwards just above or slightly behind the withers. This causes the hair on the back to lie naturally flat. If you are using a western saddle blanket, it may be folded in half. Make sure the fold line follows the spine of the horse. An English saddle pad, either saddle-shaped or square, may have attachments that connect to the D-ring on the English saddle to keep everything in place. Take care not to put the pad on upside down so the straps irritate the horse.

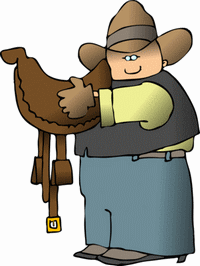
Adjusting a western saddle
Phase Two: Placing the saddle.
Place the saddle onto the pad. If you are using an English saddle, make sure the stirrups are run up. The girth should be placed over the saddle so that nothing will accidentally smack the horse and spook it. If using a western saddle, fold the stirrups onto the saddle and loop them on the horn. The same rule applies with the girth, or “cinch”. Carefully lift the saddle clear over the horse and gently place it on the pad or blanket taking care to be gentle. Like the pad, the saddle should be placed slightly forward then pushed slightly back into place. Make sure the saddle is centered. When a horse is resting a hind leg when putting on a saddle, you will notice that when you start walking the saddle will be off balance. Keep in mind that western saddles can be quite heavy, so make sure you can successfully lift it over a horse before attempting to saddle one.
Phase Three: Check for problems.
Look at the saddle and pad position. Are there any wrinkles? Is the saddle and pad even on both sides of the horse? Now you can gently let the girth hang loose.
Phase Four: The girth or cinch.
It’s time to fasten the girth or cinch. While beside your horse, reach underneath and grasp the hanging girth. Pull it up and either buckle or tie it to the saddle. Begin with it loose, and gradually tighten it without making the horse lose it’s breath. The girth, when fastened, should lay about a hand’s width directly behind the point of elbow. It should be in this position on both sides of the horse. Make sure the girth is just tight enough to keep the saddle in place.
Phase Five: Finishing touches.
If there are any fasteners from the pad to the saddle, do them up, and well as the back cinch (if their is one on a western saddle). Never do up a back cinch tightly — this may cause a horse to buck. The back cinch is meant to droop a couple inches beneath the horse’s stomach. Now is a good time to put on the bridle.
Phase Six: Re-check and tighten the girth.
Check the girth and tighten it if necessary. Many riders want to tighten the girth as much as they can because they think this will keep the saddle from slipping. Remember your horse needs to breathe, and that if the saddle fits properly and you are riding well balanced, there is no need to choke the horse. Quite snug is sufficient. Also, pull your horse’s front legs forward and far as you can like a stretch, as this will remove any wrinkles or pinches caused by the girth.
Important Note:
 Always walk your horse a moment before riding, and re-check the girth before mounting. You will likely discover that it it more loose than before because the horse bloated itself up. It is wise the check the girth again after riding for a minute. Before mounting, make sure the stirrups adjusted correctly for you. Be careful leading your saddled horse through doorways, stall doors, narrow spaces etc. because anything protruding from the tack (like a stirrup leather) could get snagged on something and this may frighten the horse and cause it to leap forward. Try to keep the animal straight through doorways and make sure there is plenty of clearance for the horse’s sides. And don’t be afraid to ask for help! If you have never done this before, get someone to help you the first few times. It is much better to tack up a horse properly than have a bad or potentially dangerous experience.